
How to Disable Quick Access in Windows 11?
Moreover, you are able to disable/reenable Quick Access.
- Open Windows 11 Registry Editor as administrator.
- Navigate to HKEY_CURRENT_USER\SOFTWARE\Microsoft\Windows\CurrentVersion\Explorer\Advanced.
- Double-click on the LaunchTo string to open its settings window.
- In the settings window, change its value data to 0.
- Click OK to save changes. You may also need to restart your PC.
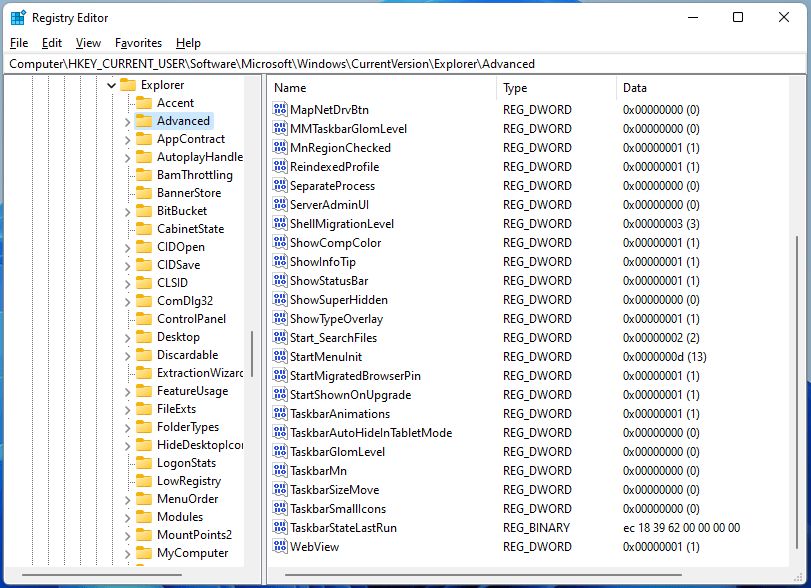
To reenable Quick Access, just change the value data of the LauchTo key back to 1.
How to Remove Quick Access from File Explorer Windows 11?
To completely remove quick access items from Windows Explorer, follow the below guide.
Method 1
- Launch an elevated Registry Editor.
- Go to HKEY_CLASSES_ROOT\CLSID\{679f85cb-0220-4080-b29b-5540cc05aab6}\ShellFolder.
- Double-click the Attributes key in the right section.
- In the popup, change the value data to a0600000.
- Click OK to save the change.
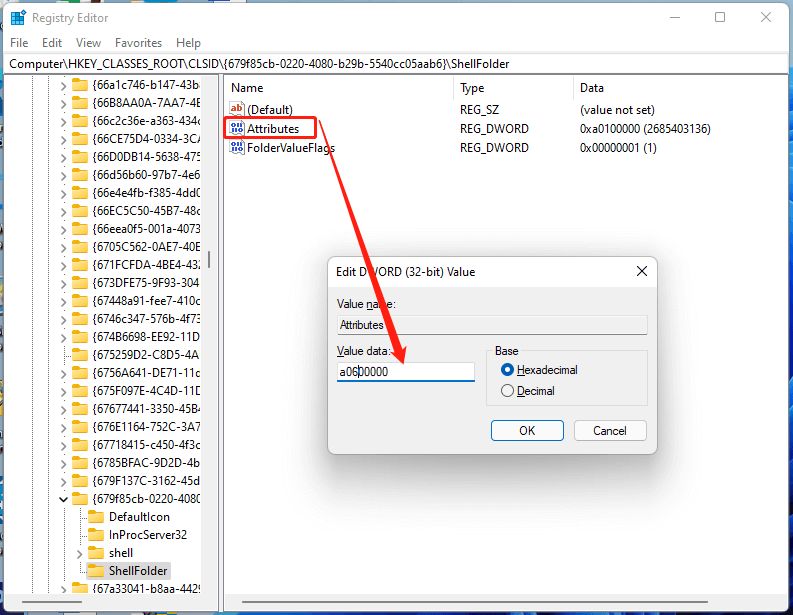
You may need to restart your computer to make the change effective. To re-add Quick Access into the File Explorer, just change the valued data of the Attributes key back to a0100000.
If you are unable to alter the value data. You need to firstly change the permission.
1. Right-click on ShellFolder and select Permissions.

2. In the new window, click the Advanced button.
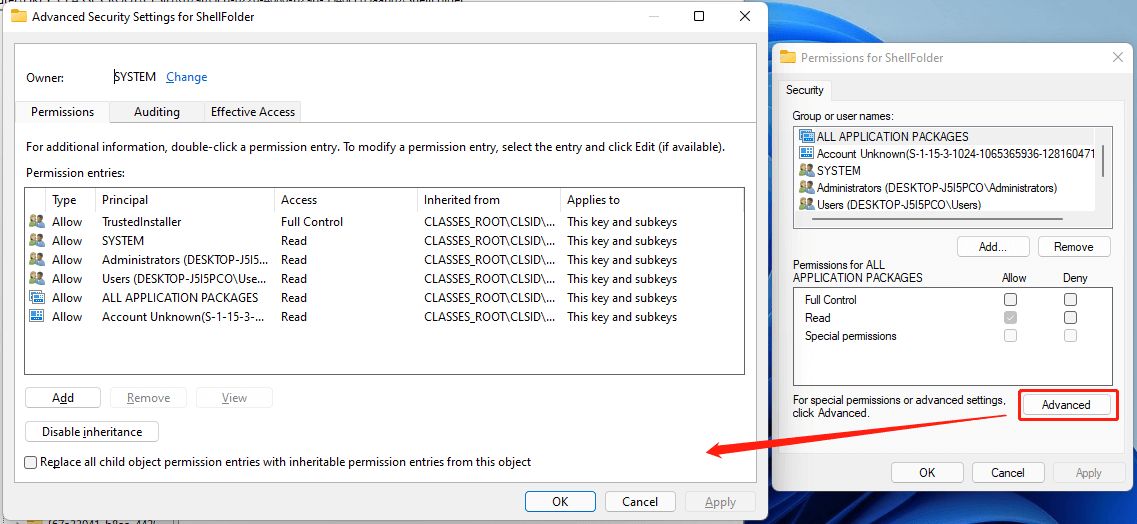
3. Next, click the Change option on the top.
4. In the new window, select Advanced again.
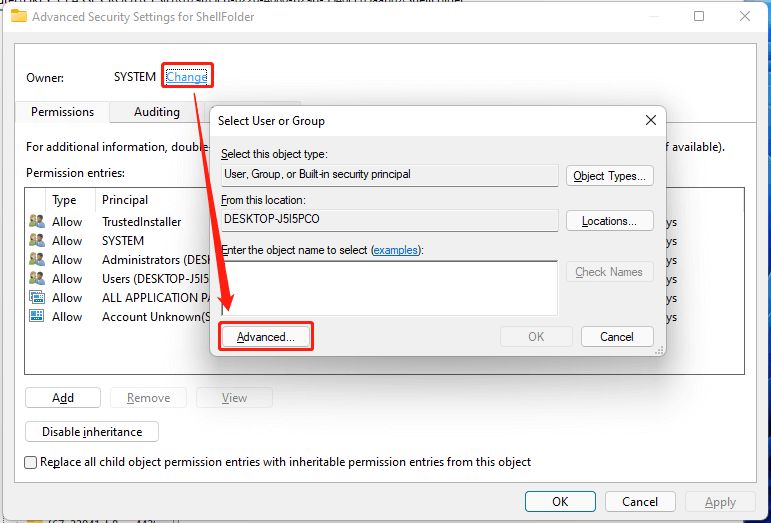
5. Then, click Find Now and choose Administrators in the search results.
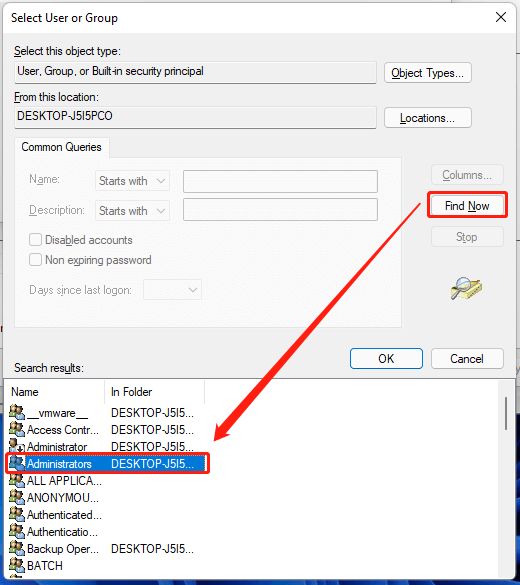
6. Click OK or Apply > OK in each opened window until go back to the Registry Editor.
Method 2
1. Move to HKEY_CURRENT_USER\SOFTWARE\Microsoft\Windows\CurrentVersion\Explorer.
2. Right-click on the blank area in the right section and select New > DWORD (32-bit) Value.
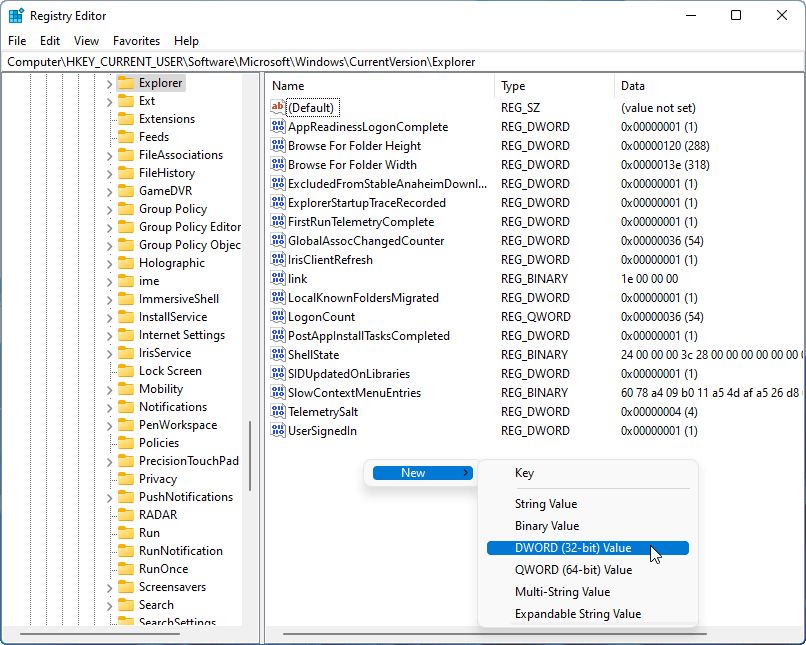
3. Name the new value as HubMode.
4. Double-click HubMode and change its value data to 1.
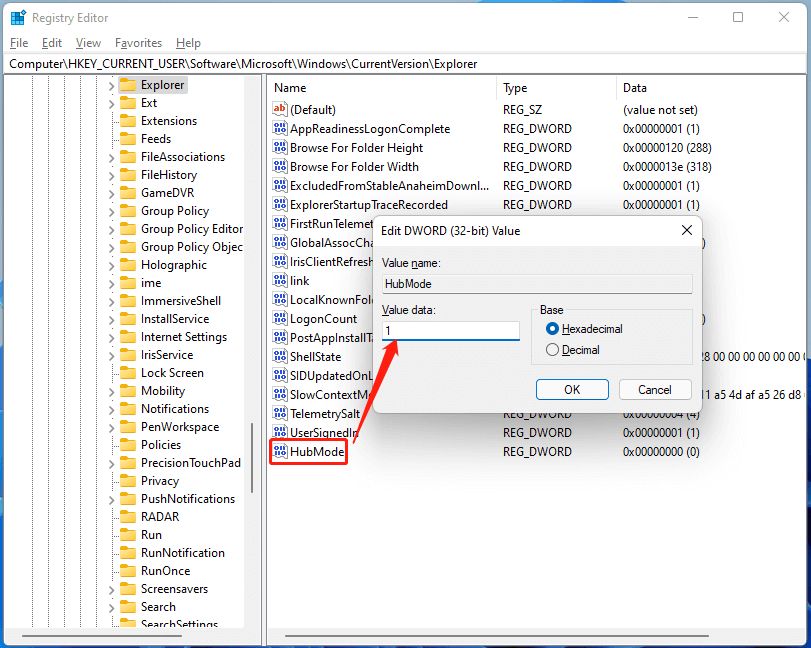
You may need to restart your PC to save the change. To reenable Quick Access in File Explorer’s navigation pane, just delete the HubMode key.